")


eXtro media Responsive Gallery users manual
- System requirements and installation
- Creating a new gallery / configuration
- Creating a new menu entry
- Using the plugin to output the galley in a joomla article
- The editor plugin
- Frontend output
1. System requirements and installation
System requirements:
The eXtro media Responsive Gallery component has the same system requirements as the Joomla 3.x CMS. If you can operate a Joomla 3.x system, the eXtro media Responsive gallery component can be installed any time.
PHP Memory:
Since the emgallery can automatically create thumbnail and full images, at least 96MB of PHP memory are needed. If your Webhosting package has less than this, you may run out of memory when rendering HD images.
Installation:
In your Joomla backend, navigate to eXtensions -> eXtensions -> Install, choose the eXtro-media Gallery ZIP file and click on upload & install.
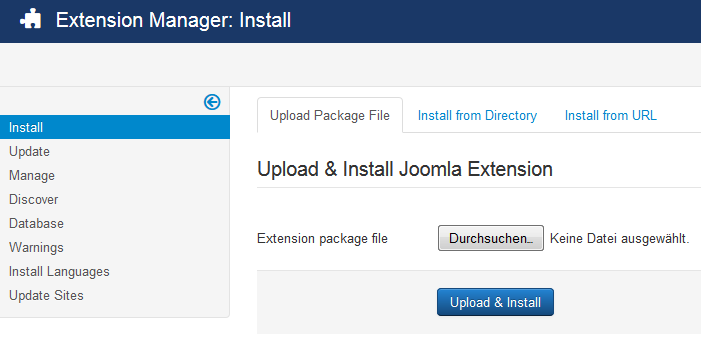
The component will now be uploaded and installed, you will receive a message when the installation process has finished.
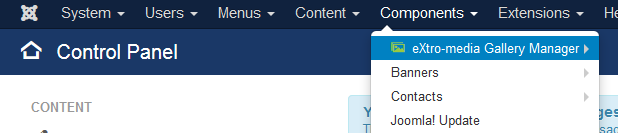
Once the eXtro-media Responsive Gallery component has been installed, it can be configured in the backend via Components -> eXtro-media Gallery Manager.
2. Creating a new gallery / configuration
In order for the emgallery to find your images, they need to be uploaded first to a directory within the images directory of your Joomla installation.
There are multiple way to upload your images to a appropriate directory - here are the 2 most common ways:
1. Use the Joomla Media Manager
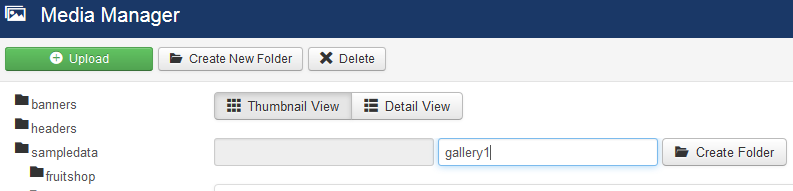
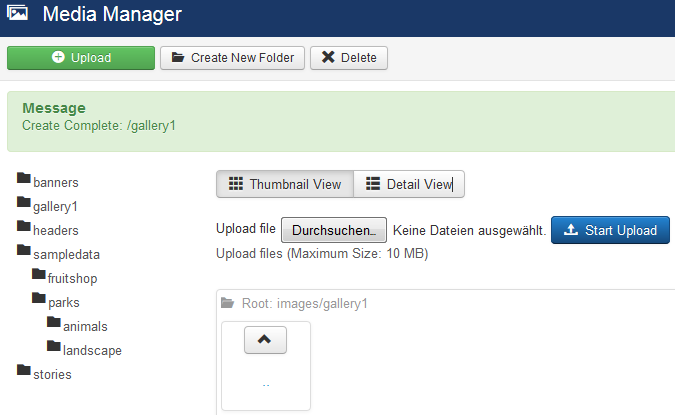
In the Joomla backend, click Content -> Media Manager to open the Media management component. The Media manager is used to create directories, upload images, and delete them again when needed. You are already within the images directory, so your first step is to create a directory for your images, e.g. gallery1, by clicking the button create directory. Next, change to the directory you just created by clicking its name. Click the button Upload to upload one or multiple images files to this directory.
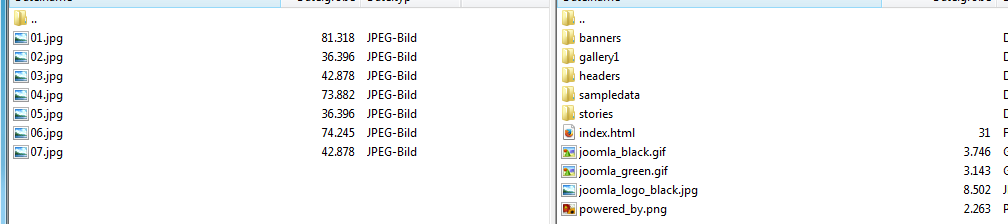
Open your FTP client program (e.g. FileZilla or WinSCP) and connect to your server / web package, and switch to your Joomla installation's directory. Find the directory 'images' and switch to it. Now create a new directory, e.g. gallery1, and switch to this directory. Now upload your image files to this directory, and switch back to your browser and your Joomla backend.

Now continue configuring your gallery in the Joomla backend:
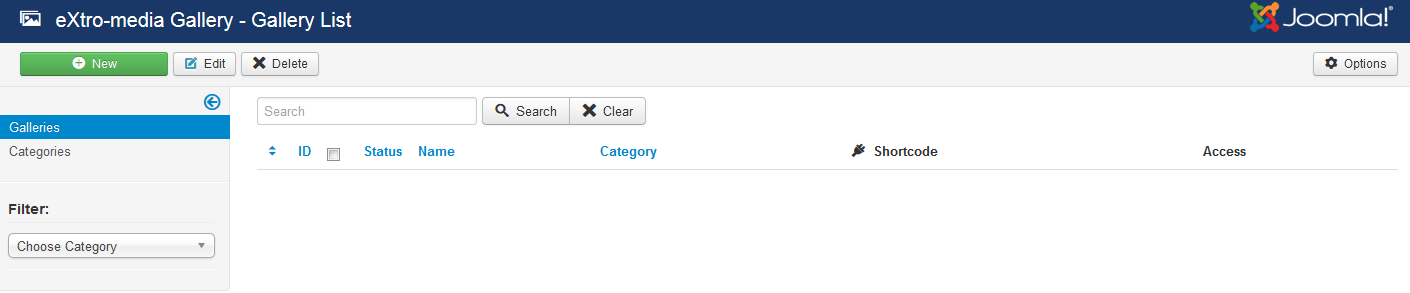
Click on components -> eXtro-media Gallery Manager -> Galleries to view your existing galleries, or to create a new gallery.
If you've done a fresh installation of the eXtro media Responsive gallery component, you don't see any galleries yet - click the button 'new' to create a new gallery
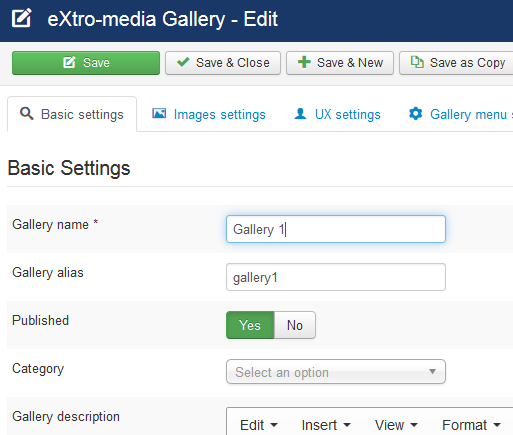
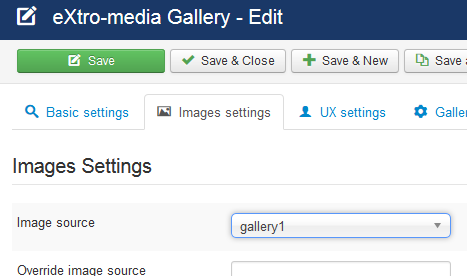
First, enter a name for your gallery within the tab 'basic settings', and in the tab 'images settings' , choose the directory to which you've uploaded your images (e.g. gallery1 ).
In certain other gallery components, you need to create a image item for each single image you want to display in your gallery. In the eXtro media Responsive Gallery component, all you need to do is to define a name for your gallery and choose the directory where your images are stored - so you'Re not working for the gallery, instead, the gallery component is working for you.
Now save the gallery by clicking the 'Save' button - all other parameters are set to default values, so you can instantly use the gallery. Below, you can find a description of all parameters (in case you wish to change them), ordered by the tab they're assigned to.
Basic settings:
- Gallery name: the name of your gallery
- Gallery alias: will be created automatically from the gallery name
- Published: Yes or No
- Category: if you want to use categorization, choose a category here (categories need to be created separately in the gallery category manager)
- Gallery description: the gallery description - it will be displayed above the gallery images in FE
Images settings:
- Image source: choose the directory in which your images are stored (within the images directory)
- override image source: if your images are stored outside the images directory, enter the path here (this is a advanced setting - please make sure you know what you are doing)
- Use optimized big image: Yes or No
- Width/height of big image: If you use the optimized big image, it will be rendered to this width/height , the longest axis will be used
- Width of preview image: Width of the preview image in pixel
- Height of preview image: Height of the preview image in pixel
- Image ordering: choose from ascending, descending or random ordering
- Background color: Select your background color for the full image overlay
- Background opacity: Select your background opacity for the full image overlay - this can create a half transparent background
- Preload images: Yes or No
- Number of preloaded images: This number of images will be preloaded
- Autoplay: Yes makes the gallery to start automatically
- Loop play: Yes restarts the gallery from the beginning when it reaches the last image
- Display time: The single images will be display this long, in milliseconds
- Margin: The margin around the full image
- Resize fading time: The image transition time between 2 gallery images
UX settings:
- Display prev/next buttons: Yes or No - on Yes, prev/next buttons will be displayed
- Display prev/next buttons on open: Yes or No - on Yes, prev/next buttons will be displayed on open.
- Duration of buttons display: Buttons will be displayed this long (in milliseconds) before fading out
- Display controls on open: Yes or No - on Yes, the controls will be displayed on open
- Duration of initial fading: Initial fading will be this long, in milliseconds
- Duration of initial controls display: Controls will be initially displayed this long
Gallery menu settings:
- Display menubar: Yes or No - on Yes, the menubar will be displayed
- Autohide menubar: Yes or No - on Yes, the menubar will be hidden automatically
- Menubar background color: The background color of the menubar
- Menubar opacity: The opacity of the menubar - this creates a transparent menubar
Gallery info settings:
- Display infobar: Yes or No - on Yes, the infobar will be displayed
- Autohide infobar: Yes or No - on Yes, the infobar will be hidden automatically
- Infobar background color: The background color of the infobar
- Infobar opacity: The opacity of the infobar - this creates a transparent infobar
- Infobar position: inside places the infobar inside the full image, outside places the infobar at the bottom of the browser window
- Allow infobar pin: Yes or No - on Yes, the infobar can be pinned
- Duration of title display: The title will be displayed that long , in milliseconds
- Title padding: padding of the title
Advanced settings:
- Access level: only users with this access level (or better) can see this gallery
- Image descriptions: Please refer to this link for a full description of this setting: https://www.extro-media.de/en/manual-responsive-gallery.html?anl=1
3. Creating a new menu entry
The easiest method to display a gallery in the frontend is to create a menu entry for it.
In the backend, click Menus -> *your menu* -> Add new menu item. Enter a menu title and choose 'eXtro-media Gallery -> A single gallery' as menu item type.
Next, select the gallery you want to display from the 'Galleries' dropdown.
Last, click on the 'Save' button to save your menu item.
In the frontend of your site, you will see now the new menu item you just created, click it to see the gallery that is assigned to it.
The eXtro-media Gallery component has 2 more menu item types:
- All galleries from all categories: display all galleries in a category view
- All galleries from one category: display all galleries from one category in a category view
If you use one of these 2 options, you will see a category view in frontend first.
Upon clicking one specific gallery, the respective gallery will be displayed.
4. Using the plugin to output the galley in a joomla article
If you want to display a gallery in a Joomla article instead of using the menu item, you can use the Plugin that is already included. To use it, create a gallery first as described in "2- Creating a new gallery / configuration". Next, go to the eXtro-media Gallery Manager to get a overview of all galleries that have been created. In the column labelled 'Shortcode' , there is a shortcode that controls the plugin for each gallery. Copy this shortcode (Ctrl-C) and edit the article where you wish to display this gallery (Content -> Articles) . Paste the shortcode (Ctrl-V) into your article at the place where you want the gallery to be shown, and save the article again.
Now go to the frontend of your site, browse to the article you just edited. The gallery you added to this article will be displayed instead of the shortcode.
5. The editor plugin

A alternative to the method described in "4- using the plugin to ..." is to use the editor button 'Insert gallery' instead of manually copying the shortcode.
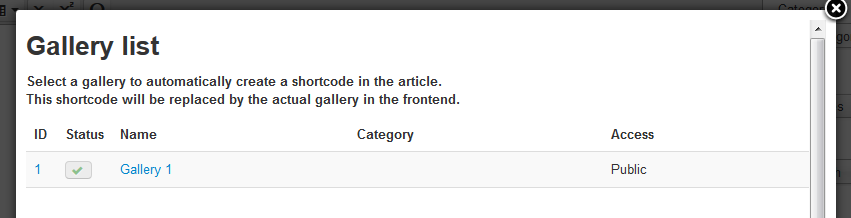
While editing your article, click the button 'Insert gallery'. A lightbox containing a list of your galleries will open. Klick on the gallery's name you want to insert into the article, and the respective shortcode will automatically be generated and inserted into the article.
6. Frontend output
There are 4 ways to output the emgallery in the frontend of your site:
- a single gallery via a menu item
- all galleries from one category via a menu item
- all galleries from all categories via a menu item
- a single gallery within a Joomla article via the plugin
Methods 2 & 3 (all galleries from one/all categories) display a category view of the galleries contained.
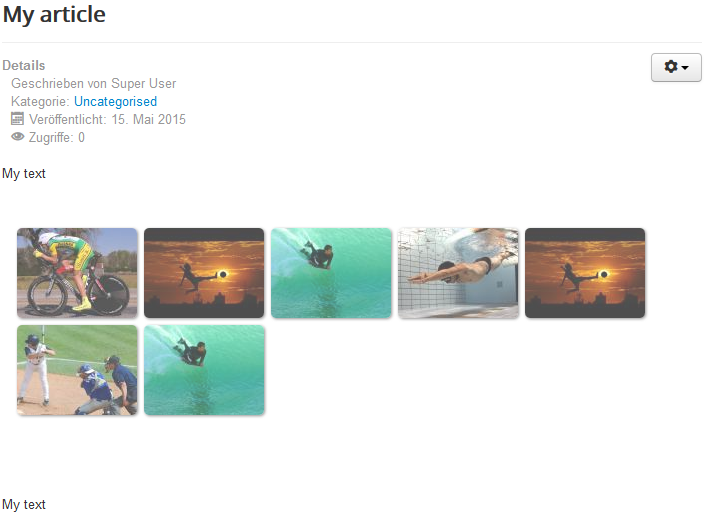
Frontend output via plugin in a article:
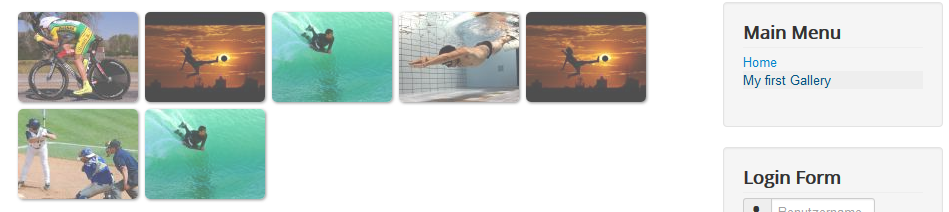
Frontend output via menu item:
2026-05-06